Merge Fields in Email Templates
An employee must be assigned to the Shop with a Power User role or higher to create and edit templates on a Shop Owner level.
You can use merge fields to insert data from ShopCtrl into the mail template to automatically retrieve it when you create an email based on the template.
How to insert merge field
To insert a merge field into the mail template:
- Open template for editing.
- Place cursor where you would like to insert the merge field and type the merge field name
$$EntityName.FieldName$$. Or select and insert it using the pull-down merge field buttons in the menu above the mail body. - Apply formatting depending on the merge field type.
- Proceed to edit the mail template as usual.
You can always retrieve the whole list of merge fields by clicking the Available MergeFields button. Please see the List of Merge fields for more information.
How to apply numeric merge field formatting
To configure the output format of the numeric merge field in the mail template:
- Select the Numeric type merge field you would like to edit.
- Before the closing dollar signs, type:
#and follow by the decimal format, for example:0,00. - Proceed to edit the mail template as normal.
Examples of numeric fields formatting:
| Field Code | Generated Output |
|---|---|
| $$Order.OrderTotalExVat$$ | 1,559,917.36 |
| $$Order.OrderTotalExVat#0.0000$$ | 1559917.3600 |
| $$Order.OrderTotalExVat##,#.00$$ | 1,559,917.36 |
| $$Order.OrderTotalExVat##,###.$$ | 1,559,917 |
| $$Order.OrderTotalExVat#€#,###.00$$ | €1,559,917.36 |
| $$Order.OrderTotalExVat####,0.00kg$$ | 1,559,917.36kg |
Please view .NET Custom numeric format strings for more information.
How to apply date merge field formatting
To configure the output format of the date merge field in the Word document template:
- Select the Date and Time Merge Field you would like to edit.
- Before the closing dollar signs, type
#and the format you would like the date to be displayed. For example,yyyy-MM-dd. - Continue editing template as normal.
Examples of Date and Time fields formatting:
| Field Code | Generated Output en-US | Generated Output nl-NL | Generated Output fr-FR |
|---|---|---|---|
| $$Order.Date$$ | 6/25/2021 | 25-6-2021 | 25/06/2021 |
| $$Order.Date#F$$ | Friday, June 25, 2021 3:06:22 PM | vrijdag 25 juni 2021 15:06:22 | vendredi 25 juin 2021 15:06:22 |
| $$Order.Date#MMMM d$$ | June 25 | juni 25 | juin 25 |
| $$Order.Date#d-MM-yy$$ | 25-06-21 | 25-06-21 | 25-06-21 |
| $$Order.Date#dd/MMM/yy$$ | 25/Jun/21 | 25-jun-21 | 25/juin/21 |
| $$Order.Date#ddd, d MMMM yyyy$$ | Fri, 25 June 2021 | vr, 25 juni 2021 | ven., 25 juin 2021 |
| $$Order.Date#dddd dd, MMMM yyyy HH:mm$$ | Friday 25, June 2021 15:06 | vrijdag 25, juni 2021 15:06 | vendredi 25, juin 2021 15:06 |
Please see .NET Date Time Formatting for more information.
Email templates as merge fields
Email templates themselves can be used as merge fields. For example, you can create a footer template or header template and use it throughout the other templates.
The syntax of the mail template merge field is as follows: $$MailTemplate.{Template-code}$$.
Where {Template-code} is the code of the existing mail template.
To insert a merge field mail template click the Templates drop-down button in the menu above the body and select the field from the list. Or type it according to the format shown above.
Report Custom Tag
You can embed reports directly into email templates using the <Report> custom tag. The report is generated dynamically when the email is sent.
Syntax:
<Report ReportCode="{report-code}" OutputType="{Image|HTML}">{parameters}</Report>
| Attribute | Description |
|---|---|
ReportCode | The code of the Report Configuration (see how to find it below). |
OutputType | HTML renders the report as an HTML table. Image embeds it as a PNG image. |
Parameters are passed as key-value pairs separated by & inside the tag. You can combine them with merge fields. The parameter keys must match the internal parameter Name from the Report Configuration, not the label shown in the UI.
For DateRange parameters, you can pass explicit dates in yyyy-MM-dd format or use a keyword like this year, last month, last7days, etc.
Examples:
Ticket statistics filtered by date range and shop:
<Report ReportCode="Ticket_statistics" OutputType="HTML">FromPeriod=2026-04-01&TillPeriod=2026-04-30&Shops=$$Shop.Id$$</Report>
Invoice statistics with a shop and year parameter:
<Report ReportCode="InvoiceStatsOverview" OutputType="HTML">ShopIdParam=$$Shop.Id$$&YearsParam=2026</Report>
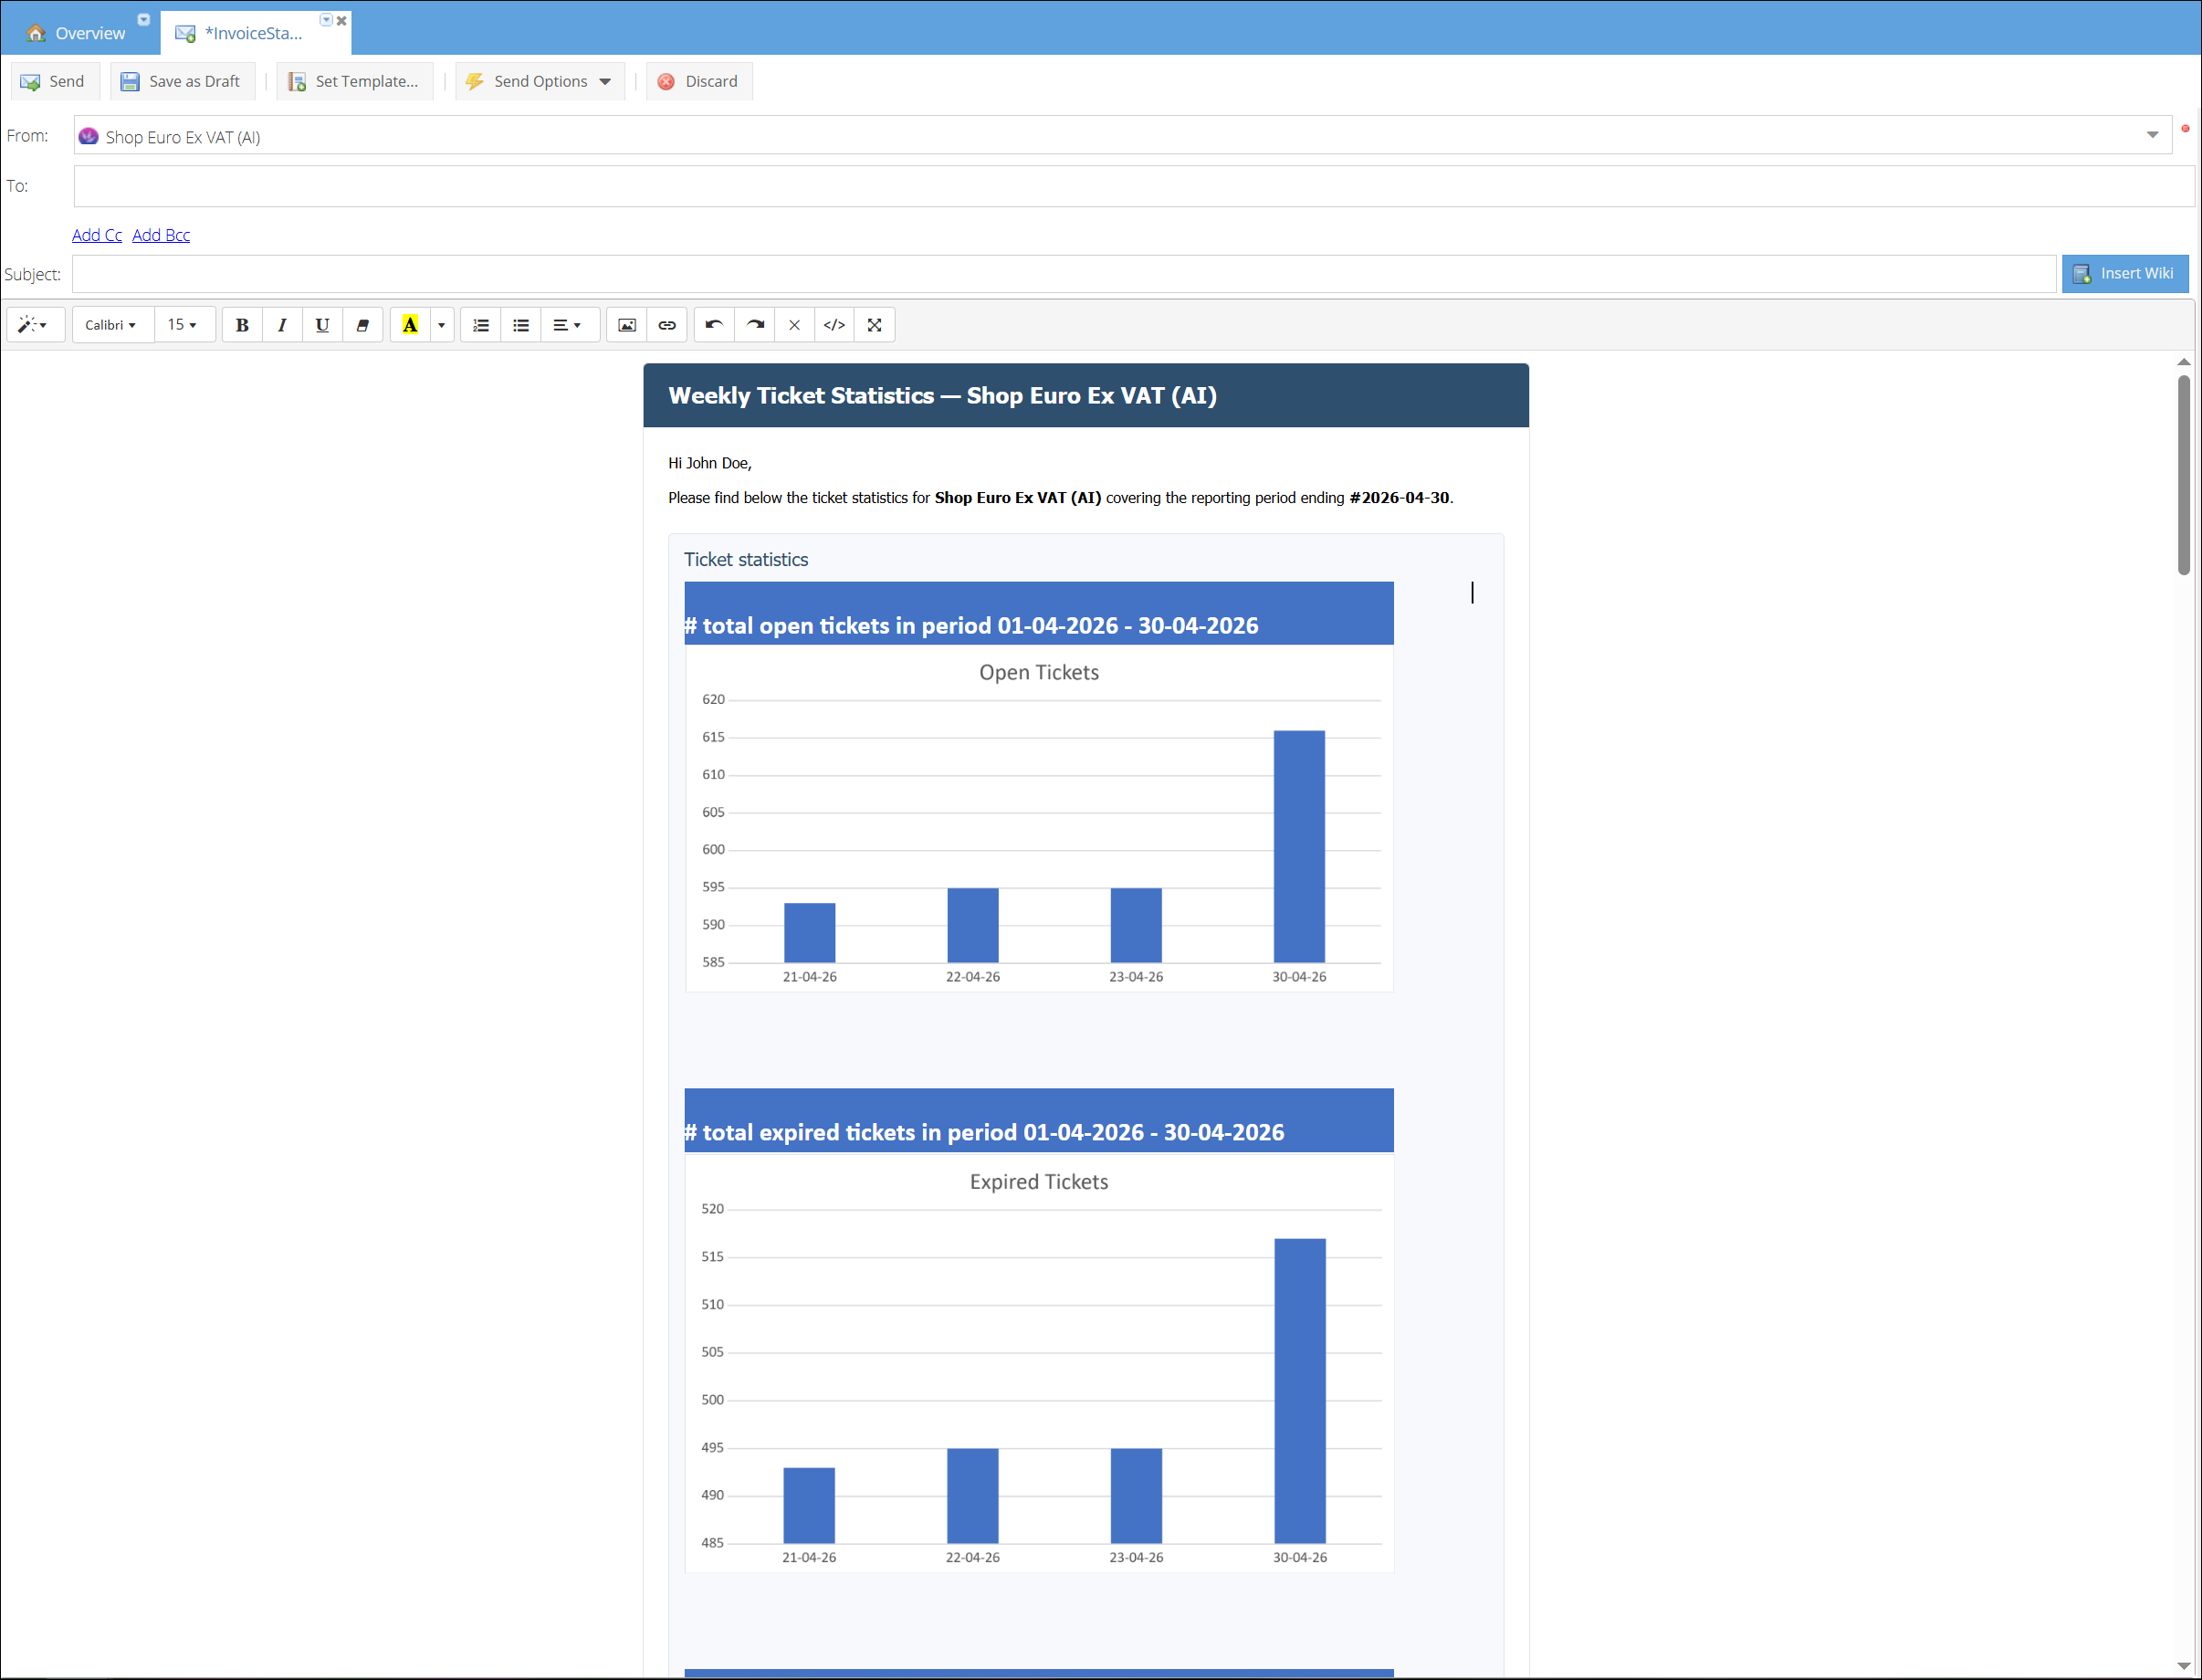
Full email template example
<html>
<head>
<meta charset="utf-8">
<title>Weekly Ticket Statistics</title>
<style>
body { font-family: Arial, Helvetica, sans-serif; color: #333; font-size: 13px; margin: 0; padding: 20px; }
.wrapper { max-width: 720px; margin: 0 auto; background: #ffffff; border: 1px solid #e5e5e5; border-radius: 4px; }
.header { background: #2f4f6f; color: #ffffff; padding: 16px 20px; border-radius: 4px 4px 0 0; }
.header h1 { margin: 0; font-size: 18px; font-weight: 600; }
.content { padding: 20px; line-height: 1.5; }
.report-block { margin: 20px 0; padding: 12px; background: #f7f9fc; border: 1px solid #e2e7ee; border-radius: 4px; overflow-x: auto; }
.report-block h2 { margin: 0 0 10px 0; font-size: 15px; color: #2f4f6f; }
.report-block img { max-width: 100% !important; height: auto !important; display: block; }
.report-block span { max-width: 100% !important; }
.footer { padding: 14px 20px; font-size: 11px; color: #888; border-top: 1px solid #eee; }
</style>
</head>
<body>
<div class="wrapper">
<div class="header">
<h1>Weekly Ticket Statistics — $$Shop.Name$$</h1>
</div>
<div class="content">
<p>Hi $$Employee.FirstName$$,</p>
<p>
Please find below the ticket statistics for <strong>$$Shop.Name$$</strong>
covering the reporting period ending <strong>$$Current.Date##yyyy-MM-dd$$</strong>.
</p>
<div class="report-block">
<h2>Ticket statistics</h2>
<Report ReportCode="Ticket_statistics" OutputType="HTML">FromPeriod=2026-04-01&TillPeriod=2026-04-30&Shops=$$Shop.Id$$</Report>
</div>
<p>Kind regards,<br>ShopCtrl Reporting</p>
</div>
<div class="footer">
Generated automatically on $$Current.Date##yyyy-MM-dd HH:mm$$ ·
$$Shop.Name$$
</div>
</div>
</body>
</html>
How to find the report code and parameter names:
Use the Reports API endpoint on your ShopCtrl instance to get the list of available reports with their codes and parameters:
GET https://{your-shopctrl-domain}/v1/Reports
Replace {your-shopctrl-domain} with the URL of your ShopCtrl environment (e.g. https://mycompany.shopctrl.com).
The response contains the Code (use as ReportCode) and ReportParameters array where each entry's Name field is the parameter key to use in the tag.
For DateRange type parameters, the Name field contains two comma-separated keys (e.g. StartDateParam,EndDateParam). Pass them as separate parameters: StartDateParam=2026-01-01&EndDateParam=2026-12-31, or as a keyword: StartDateParam,EndDateParam=this year.